
Vectorscope
The vectorscope shows a frame’s colour with its brightness taken away: which hues are in the picture and how strong they are. Use it to spot a colour cast, to check skin tones, and to see how far a grade has pushed saturation.
- Menu
- View ▸ Scopes
- Keys
- ⌃⌘W
- Where
- The Scopes panel ▸ a slot's popup ▸ Vectorscope
- Agent tools
render_frame
Open the vectorscope
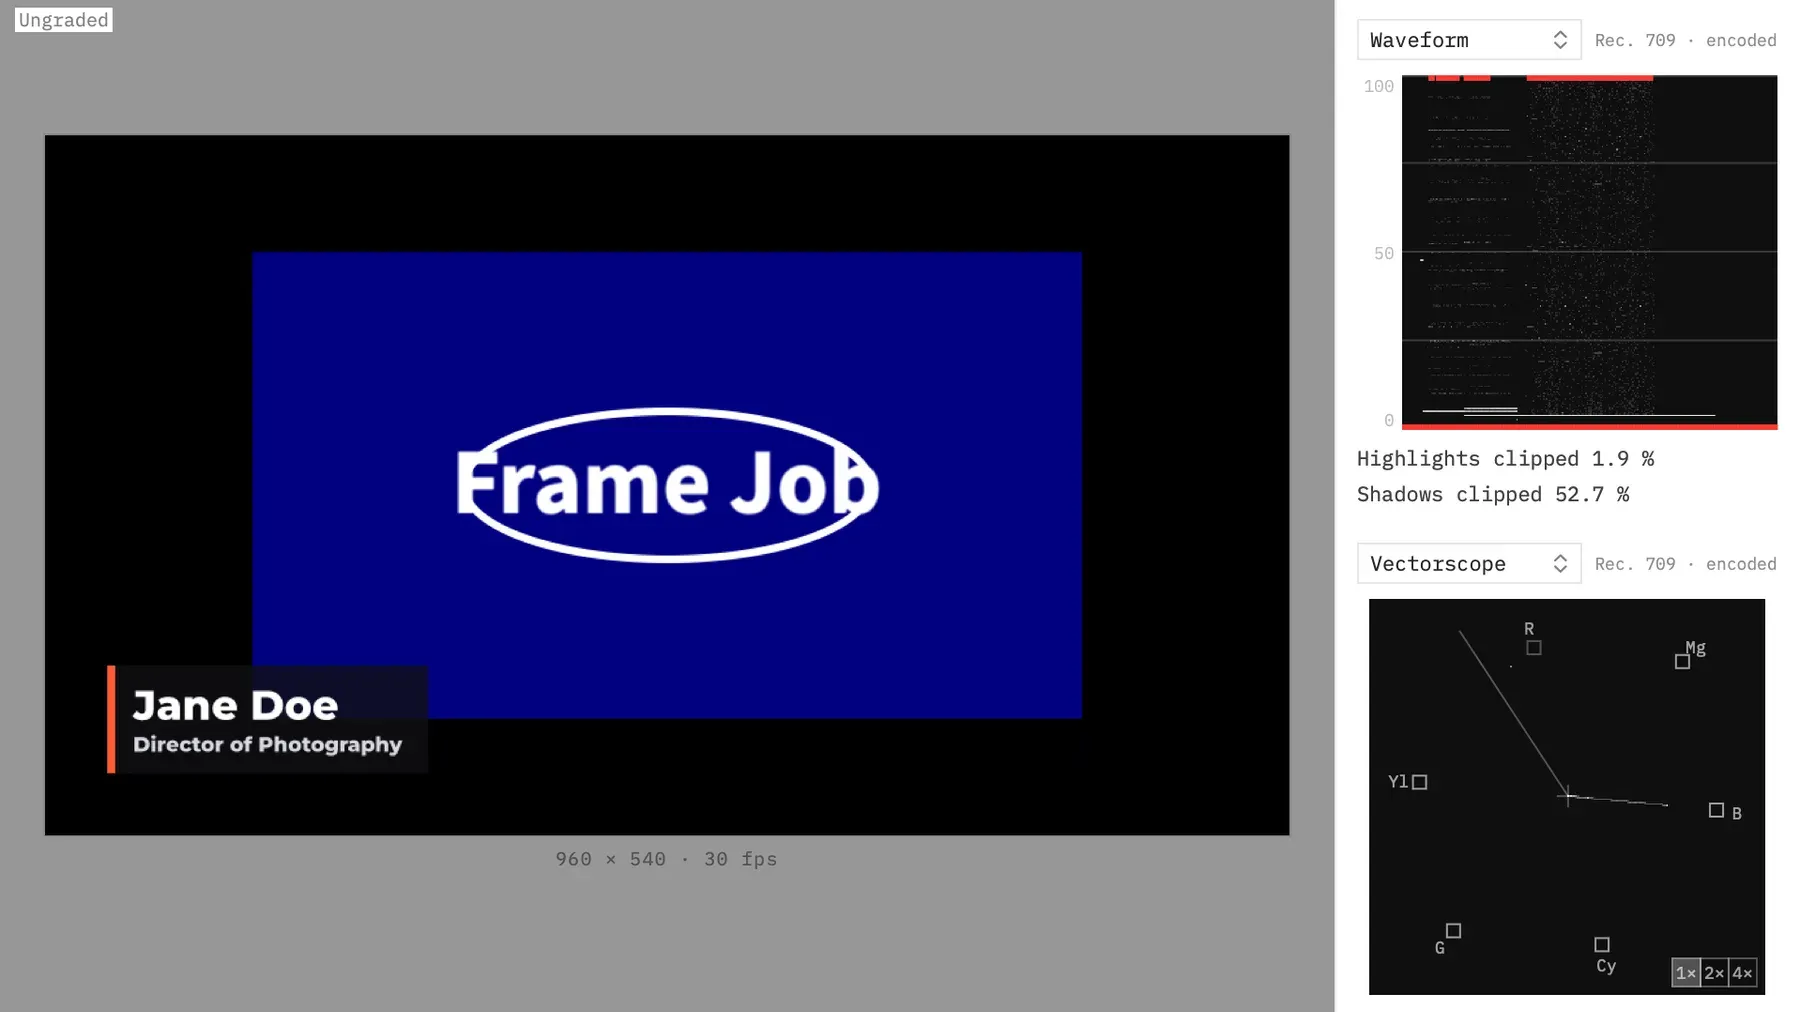
Section titled “Open the vectorscope”Choose View ▸ Scopes. In a new window the panel starts with Waveform on top and Vectorscope below. If a slot shows something else, pick Vectorscope from its popup. Both slots can show it, each at its own zoom. See Scopes for the panel itself.
Read the trace
Section titled “Read the trace”Every pixel in the frame lands somewhere on the near-black square, and the white trace is all of them together.
- The centre is no colour. Greys, black and white all sit on the faint cross.
- Distance from the centre is strength. A pale colour stays close in, and a saturated one reaches out towards the edge.
- Direction is hue. The targets show which way each colour lies.
- Brightness is how many pixels are there. The scale is logarithmic, so a small patch of colour still shows up beside a large one.
The two axes are the colour-difference signals: Cb runs across and Cr runs up. The scope draws no circles and has no readouts, so the targets and the skin line are your only references.
A picture with no colour cast keeps its neutral areas on the cross. If something that should be grey sits to one side of it, the picture leans the way the trace leans. Zoom in to see a small cast.
The targets
Section titled “The targets”Six boxes mark where 75 % colour bars land, so you can tell which way a colour lies and how strong it is. Each label sits outside its box, away from the centre.
| Label | Colour | Where it sits |
|---|---|---|
| R | Red | Up, a little left |
| Mg | Magenta | Up and right |
| B | Blue | Right, a little down |
| Cy | Cyan | Down, a little right |
| G | Green | Down and left |
| Yl | Yellow | Left, a little up |
The skin line
Section titled “The skin line”The line running out from the centre, up and to the left, marks where skin tones fall. It’s drawn at the hue of a standard light-skin reference colour, 123.3° anticlockwise from the right.
Skin has a similar hue across complexions, and mostly differs in brightness and strength. If the trace from a face sits well to one side of the line, the picture has a cast.
Zoom in on a low-saturation picture
Section titled “Zoom in on a low-saturation picture”The 1×, 2× and 4× cells in the scope’s bottom-right corner zoom in around the centre, to show small casts in a picture with little colour in it. Click a cell to choose it. The filled cell is the current zoom.
Frame Job counts the pixels again at each zoom instead of enlarging the picture of the trace, so a magnified trace stays sharp.
At 2× and 4×, a pixel too strong to fit on the square is left off, and it isn’t piled up against the edge. At 1× everything fits.
All six targets are too far out to fit at 2× and 4×. Each one becomes a 6 pt tick on the rim that points towards it, with its label inside the rim.
Each slot keeps its own zoom when you pick another scope and come back, and when you hide the panel and show it again. A zoom lasts while the window is open. It isn’t saved, and every slot starts at 1× in a new window. A cell works on the first click, even when its window isn’t the active one.
Good to know
Section titled “Good to know”- The scope measures the frame the preview composes, so it follows playback, your edits and Show Ungraded. It changes nothing in the project or in an export.
- The slot’s caption says what the scope reads: “Rec. 709 · encoded”, the picture’s own encoded values.
- In an HDR (HLG) project the caption reads “Rec. 2100 HLG”, and the targets and the skin line are redrawn for that colour space, with the skin line at 139.9°. With Show SDR Version on, the scope reads that SDR picture as it would in an SDR project. See Scopes in an HDR project.
- The scope is a 224 pt square. If the preview pane is too short for both slots, it shrinks with them and stays square. Under 360 pt tall, only the top slot shows.
With an agent
Section titled “With an agent”render_frame measures a frame’s vectorscope as numbers when an agent passes vectorscope: true, which is off by default. vectorscope_zoom chooses 1, 2 or 4, and is 1 unless set. The reply says what share of the frame is neutral and, at 2 and 4, what share lies off the plot. The counts, the targets and the skin line’s angle go to a .vectorscope.json file beside the image. None of this changes a slot’s zoom in the panel. See Check the picture: render_frame.