
Qualifiers
A qualifier limits an adjustment clip’s grade to the pixels behind it that match up to three ranges of hue, saturation and luma. Use it to change one colour and leave the rest of the picture alone. It’s Frame Job’s secondary correction, an HSL key for a grade.
- Where
- Clip tab ▸ Color ▸ Qualifier
- Needs
- Every selected clip must be an adjustment clip.
- Agent tools
set_videoset_action_endrender_frame
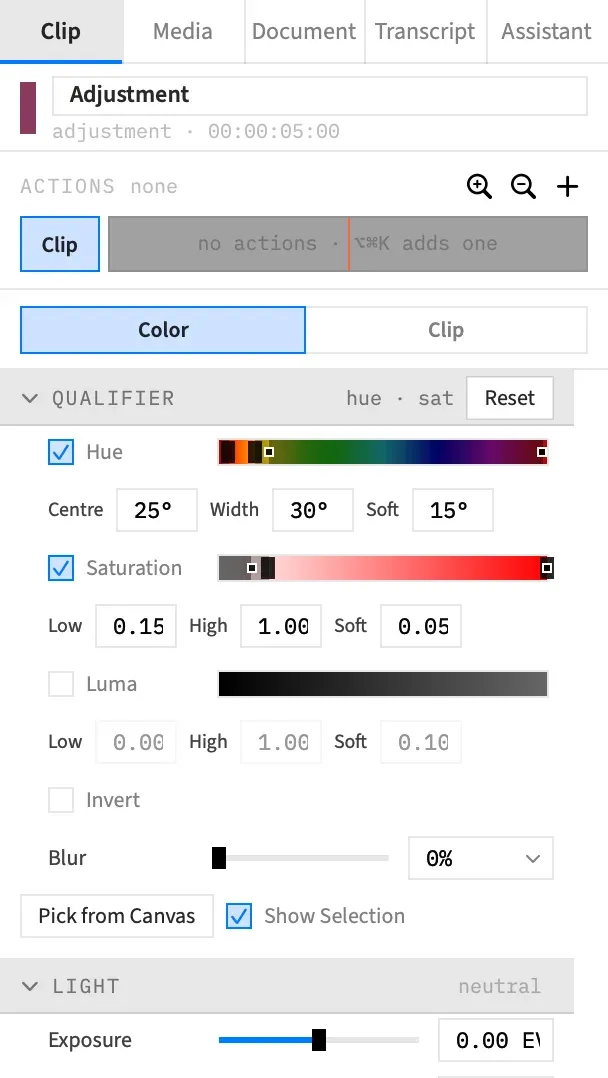
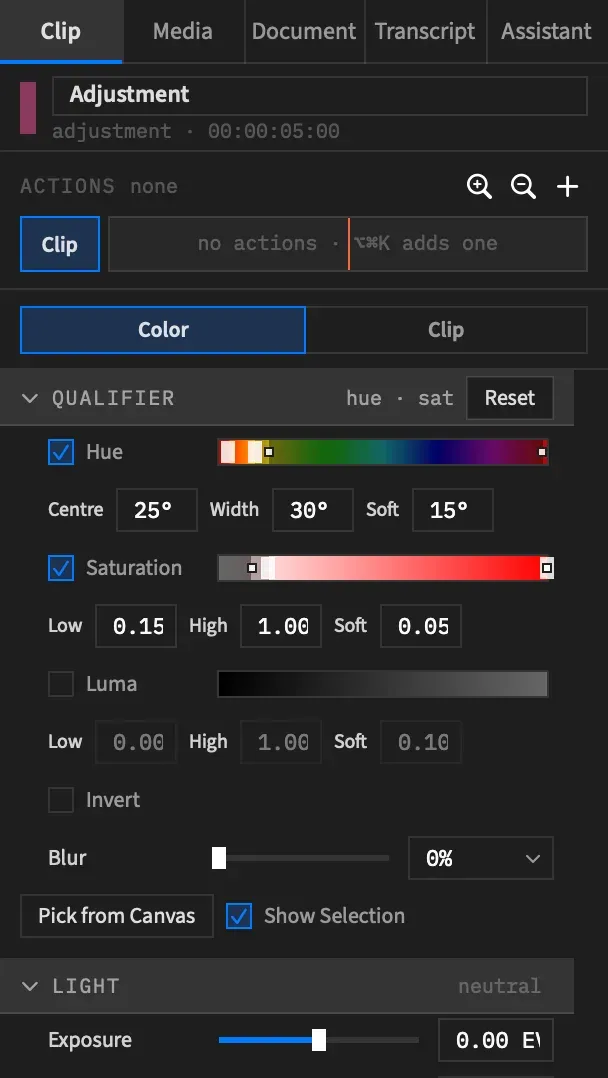
Grade one colour
Section titled “Grade one colour”-
Put an adjustment clip above the picture, for the span you want.
-
With the clip selected, give it a grade in the Color sub-tab. A qualifier on its own changes nothing, because it only narrows a grade.
-
Open the Qualifier section by clicking its header if it’s closed. Press Pick from Canvas and click the colour in the preview, or tick a range and set it by hand.
-
Tick Show Selection to see what’s picked. See Show Selection.
-
Adjust the ranges until the selection is clean, then untick Show Selection.
A qualifier reaches every track behind the clip. To keep it to one area as well, as a power window would, add a matte.
The Qualifier section
Section titled “The Qualifier section”The Qualifier section appears only when every selected clip is an adjustment clip, right after Adjustment. A picture clip can’t have a qualifier.
It holds the three ranges, then Invert, Blur, Pick from Canvas and Show Selection.
Matching reads the picture behind the clip as it was before the grade, so the grade never changes what it selects.
The Qualifier summary
Section titled “The Qualifier summary”The section’s header says what’s set: the ranges that are on, then inverted, then the blur. For example, hue · sat · inverted · blur 20%. It reads off when nothing is set.
Reset appears once anything is set, as long as no action is selected. It turns all three ranges off, clears Invert and sets Blur to 0 %, as one undo step named Qualifier.
Turn a range on
Section titled “Turn a range on”Each range has a checkbox, a strip and three fields. Tick the checkbox and the range starts at its default. Ticking or unticking is one undo step named after the range.
A range that’s off has a dimmed strip that ignores presses, and greyed-out fields, so tick it first. Unticking forgets the range’s values: tick it again and it’s back at its default.
The three ranges
Section titled “The three ranges”| Range | Picks pixels by | Strip | Fields | Default when ticked |
|---|---|---|---|---|
| Hue | Their colour | The colour spectrum, 0 to 360° | Centre 0 to 360°, Width 0 to 360°, Soft 0 to 180°, in whole degrees | Centre 30°, Width 50°, Soft 25° |
| Saturation | How colourful they are | Neutral to fully saturated | Low, High and Soft, 0 to 1, two decimals | Low 0, High 1, Soft 0.1 |
| Luma | How bright they are | Black to white | Low, High and Soft, 0 to 1, two decimals | Low 0, High 1, Soft 0.1 |
A number typed outside a field’s range is held at the nearest end of it.
Hue range
Section titled “Hue range”Centre is the colour, and Width is how much of the spectrum around it is fully picked. Soft is the fall-off outside each edge. The default sits on skin tones: 5° to 55° is fully picked, fading to nothing at 340° and 80°.
The band wraps round the spectrum, so a range centred on red picks from both ends of the strip.
Greys are never picked by hue, because a grey has no colour to match. A colour fades out of a hue range as it nears grey, from a chroma of 0.06 down to 0.02 on a scale of 0 to 1.
Saturation range
Section titled “Saturation range”This is HSV saturation: 0 is neutral and 1 is fully saturated. Low and High are the edges of what’s fully picked, and Soft is the fall-off outside each edge. At its default the range passes everything, so it does nothing until you narrow it.
Near-black reads as 0, so dark noise doesn’t count as colour. A range that starts above 0 leaves near-black pixels out.
Luma range
Section titled “Luma range”This is brightness, from 0 for black to 1 for white, measured as Rec. 709 Y′. Its fields work as Saturation’s do, and at its default it passes everything too.
Low and High never cross
Section titled “Low and High never cross”On Saturation and Luma, a typed Low is held at or below High, and a typed High at or above Low. Dragging stops at the same point.
How ranges combine
Section titled “How ranges combine”A pixel has to fall inside every range that’s on. Tick Hue and Luma and you get that colour at that brightness, not either one.
Each range falls off smoothly across its Soft value outside each edge. The partial amounts multiply, so a pixel in the soft edge of two ranges is graded less than one in the soft edge of either. Soft at 0 gives a hard edge.
Use a strip
Section titled “Use a strip”Each strip is a live picture of its range, and the quickest way to set it.
Read a strip
Section titled “Read a strip”A strip shows its own scale: the spectrum for Hue, a neutral to red ramp for Saturation, black to white for Luma. It’s dimmed 60 % outside the range and 30 % across the soft bands, so what stays bright is what’s fully picked.
The two block knobs mark the range’s edges, and the two small squares mark where the softness runs out.
Drag a strip
Section titled “Drag a strip”| Drag | What it changes |
|---|---|
| A block knob | On Hue, the Width, evenly about the centre. On Saturation and Luma, the Low or High edge. |
| A small square | Soft |
| The band between the knobs | Moves the whole range. Hue wraps round. Saturation and Luma stop at the ends of the scale, keeping their width. |
A press within 5 pt of a handle grabs it, and if a knob and a square are both that close you get the knob. A press outside the band and away from every handle does nothing. When a range runs to the end of its scale, as Saturation and Luma do at their defaults, the square sits on the knob, so use the Soft field or narrow the range first.
A drag is one undo step named after the range, and so is a number typed into a field.
Drag at a tenth of the speed
Section titled “Drag at a tenth of the speed”Hold ⌥ while you drag to move a handle at a tenth of the speed.
Reset a range
Section titled “Reset a range”Double-click a strip to put the range back to its default. It stays on. To turn it off, untick it, or right-click the row and choose Reset to default.
Invert
Section titled “Invert”Tick Invert to grade everything except what the ranges pick. It’s off by default. Use it to desaturate everything but one colour, for example.
Blur softens the selection, not the picture. On noisy footage a speckled selection turns clean, and the grade blends into its surroundings.
| Control | Range | Default |
|---|---|---|
| Blur | 0 to 100 %, a slider and a field with presets at 0, 25, 50, 75 and 100 behind its chevron | 0 % |
At 100 % the blur is a Gaussian of 24 pixels, measured on the canvas, so a Half or Quarter preview blurs the same share of the picture as an export. It’s one undo step named Qualifier Blur.
Blur never softens a matte cutting the clip, and it does nothing while no range is on.
Animate a qualifier
Section titled “Animate a qualifier”An action can animate a qualifier. Select an action on the clip’s action lane, then change a control: the change goes to the action’s end, and the numbers ramp there from the values the clip has when the action starts.
- Centre, Width, Soft, Low, High and Blur ramp smoothly.
- The hue centre takes the short way round the spectrum, so 350° to 10° passes through 0°.
- A range turned on or off, and Invert, switch at the action’s end.
While an action animates the qualifier, a strip’s band is outlined and its knobs are drawn in the action colour. The action holds the qualifier as one setting, so changing any row marks them all. See Animate a grade.
Good to know
Section titled “Good to know”- With several adjustment clips selected, the section shows the first clip’s values and a badge marks the rows that differ. A change sends the whole range to every selected clip.
- Invert with no range on grades nothing, because every pixel counts as picked and Invert takes them all away.
- Paste Attributes copies a qualifier only from one adjustment clip to another. A picture clip gets none, and an adjustment clip keeps its own when the attributes come from a picture clip.
- In an HDR project, the ranges are measured on the HLG signal and Luma uses BT.2020’s weights, so pick them again after switching a project’s dynamic range.
With an agent
Section titled “With an agent”set_video sets a qualifier through its qualifier key, on adjustment clips only. On any other clip it’s an error naming the clip.
| To | Send as qualifier |
|---|---|
| Turn a range on at its default | {"hue": {}} |
| Change part of a range and keep the rest | {"hue": {"width": 30}} |
| Turn a range off | {"hue": null} |
blur runs from 0 to 1, where the inspector shows a percentage. A number outside its bounds is an error. It isn’t held at the nearest end, as a typed number is.
render_frame can draw the picture Show Selection shows, for one adjustment clip, and set_action_end animates a qualifier. Tools: picture and grade lists every key.