
The Transcript tab
The Transcript tab shows what’s said in your project as text you can read and click. It’s the whole timeline as words, in the order you’d hear them, through every trim, speed change and nest. The spoken word lights up as the playhead passes it, and you can cut by deleting words.
- Menu
- View ▸ Transcript
- Keys
- ⌃⌘T
- Where
- Inspector ▸ Transcript, between Document and the Assistant
- Needs
- A speech model on this Mac, or an AssemblyAI transcript of the file. No key is needed to read.
- Agent tools
get_timeline_transcriptget_transcript
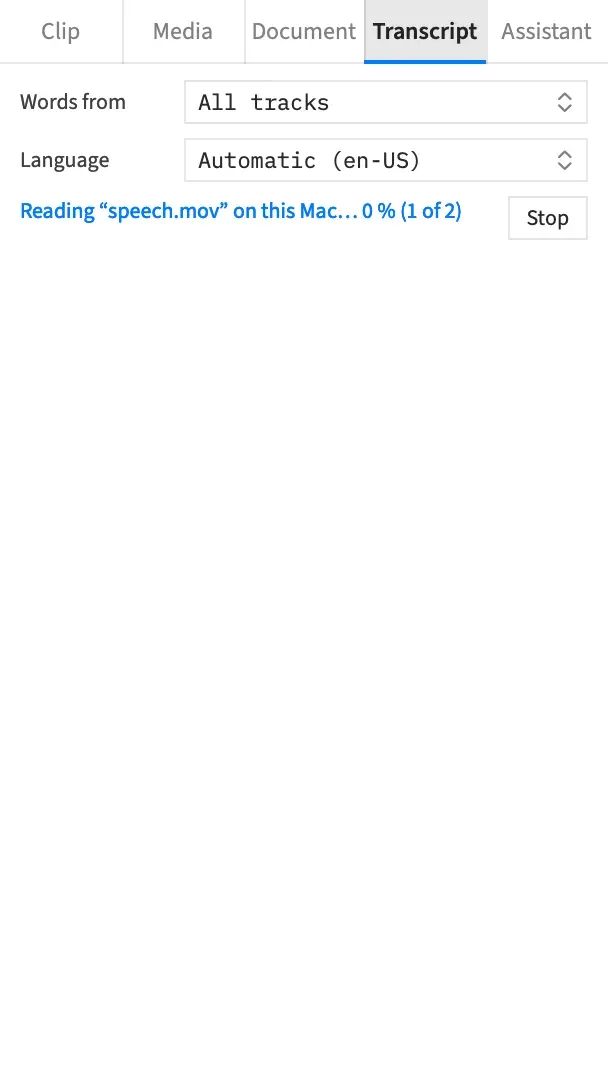
Open the Transcript
Section titled “Open the Transcript”Choose View ▸ Transcript or press ⌃⌘T. The inspector opens if it was hidden, the tab shows, and the text takes the keyboard, so the transcript keys work at once. It isn’t a toggle: choosing it again leaves the tab showing.
You can also click Transcript in the inspector’s tab strip. That shows the tab without giving the text the keyboard, until you click in it.
The first time you look, the tab may need to read your files, which means transcribing them on this Mac. See Where the transcript’s words come from.
Every word you would hear
Section titled “Every word you would hear”The tab lists every word you’d hear if the timeline played, in order. That takes in clips on every track, and clips inside nests where they play.
It leaves out what you wouldn’t hear: muted tracks, clips soloed out, clips turned down to silence and clips with their audio switched off.
With a nest open (⌘↓), the tab shows only what’s inside it.
Paragraphs and timecodes
Section titled “Paragraphs and timecodes”The words come in paragraphs, each with its timecode above it. A new paragraph starts when:
- the words move to another track
- the speaker changes, which only a transcript from AssemblyAI can tell
- there are 1.5 seconds or more between two clips’ words on one track
- the speaker pauses for 1.5 seconds or more inside a clip
A change of speaker starts a paragraph, and the tab doesn’t print a speaker’s name.
Some words show faint, and a pause over a second can show as a grey length such as “[2.4 s]”. Those are about cutting. See Cut by deleting words and Shorten a pause.
The bar
Section titled “The bar”A bar sits above the text and stays put while the text scrolls. It holds the two pop-ups, then short notes on what the tab is doing and anything it couldn’t read.
Words from and Language belong to the window. They stay while it’s open, whichever tab you look at, and they aren’t saved with the project.
Words from
Section titled “Words from”Words from chooses whose words to show: All tracks, the default, or one track by name. With one track chosen, the tab shows only the words on it, and reads only the files with a clip on it. If that track goes away, the tab goes back to All tracks.
Language
Section titled “Language”Language chooses the language files are read in on this Mac.
Automatic is your Mac’s language, shown in brackets as a code such as en-US. If you have no speech model for it, Automatic uses another form of the same language, or failing that the first language you have. Below it is every language your Mac has a speech model for. The pop-up is disabled when there are none.
Choosing a language reads the files again in that language. The earlier reading is kept too, so switching back is immediate. A file with an AssemblyAI transcript keeps showing that transcript whichever you choose.
Read and Stop
Section titled “Read and Stop”While a file is being read on this Mac, a note shows its progress, with Stop beside it:
Reading “interview.mov” on this Mac… 40 % (1 of 2)
Stop leaves the rest of the files unread, and the note changes:
Stopped. 2 files not read on this Mac.
Read carries on from there, and so does coming back to the tab after looking at another one. Editing the timeline or changing Words from or Language doesn’t start it again.
A file you stop part-way isn’t kept, so it’s read from its start next time. Stop ends only the tab’s own reading: if an agent is waiting for the same file’s words at that moment, its reading goes on.
Clips with no words
Section titled “Clips with no words”A clip that can’t give any words is listed under the pop-ups by name with the reason, such as ““Interview.mov” (clip 12) — its audio is switched off”. A clip inside a nest reads ““Interview.mov” (clip 12 in nest Intro) — …”.
The name is the one the timeline shows. The number is the clip’s id in the project, and the Assistant can select a clip by it.
| The note says | What to do |
|---|---|
| its audio is switched off | Turn the clip’s audio on. |
| its media has no audio track | Nothing. The file has no sound to read. |
| its media file is missing | Relink the file. |
| it plays in reverse, so its speech cannot be transcribed | Turn off Reverse to read it. |
The first three clips are listed. “…and 4 more clips with no words.” stands for the rest, and holding the pointer over it lists them.
The same speech on two tracks
Section titled “The same speech on two tracks”When two clips carry the same speech, such as a camera’s sound and a separate microphone, a note names the pair:
“Interview.mov” (clip 5) and “Mic.wav” (clip 6) carry the same speech. Mute one, or switch its audio off, to read it once.
Both stay in the text until you do. The same words appear twice in the text, and clicking one moves the playhead there, which shows you where the two clips play. The note appears for clips of different files that overlap for at least 5 seconds, when at least 60% of the words of the clip with fewer words in that overlap also appear in the other, in the same order.
Good to know
Section titled “Good to know”- Nothing you do in the tab’s bar changes the project, and the words aren’t part of your edit.
- The tab has no search.
With an agent
Section titled “With an agent”Agents read the same words with get_timeline_transcript. It returns the same notes as notes and the clips with no words as no_words, and its tracks and language do what Words from and Language do. See get_timeline_transcript.