
The Color tab
Grading is how you correct a clip’s colour and tone and give it a look of its own. The Color sub-tab of the Clip tab holds every control for it: exposure and white balance, colour wheels, curves and looks. The settings on a clip are its grade.
- Where
- Clip tab ▸ Color
- Agent tools
set_videoset_action_endundo
Open the Color tab
Section titled “Open the Color tab”-
Select one or more clips on the timeline.
-
Open the inspector’s Clip tab.
-
Choose Color in the row of sub-tabs.
-
Open the section you want by clicking its header.
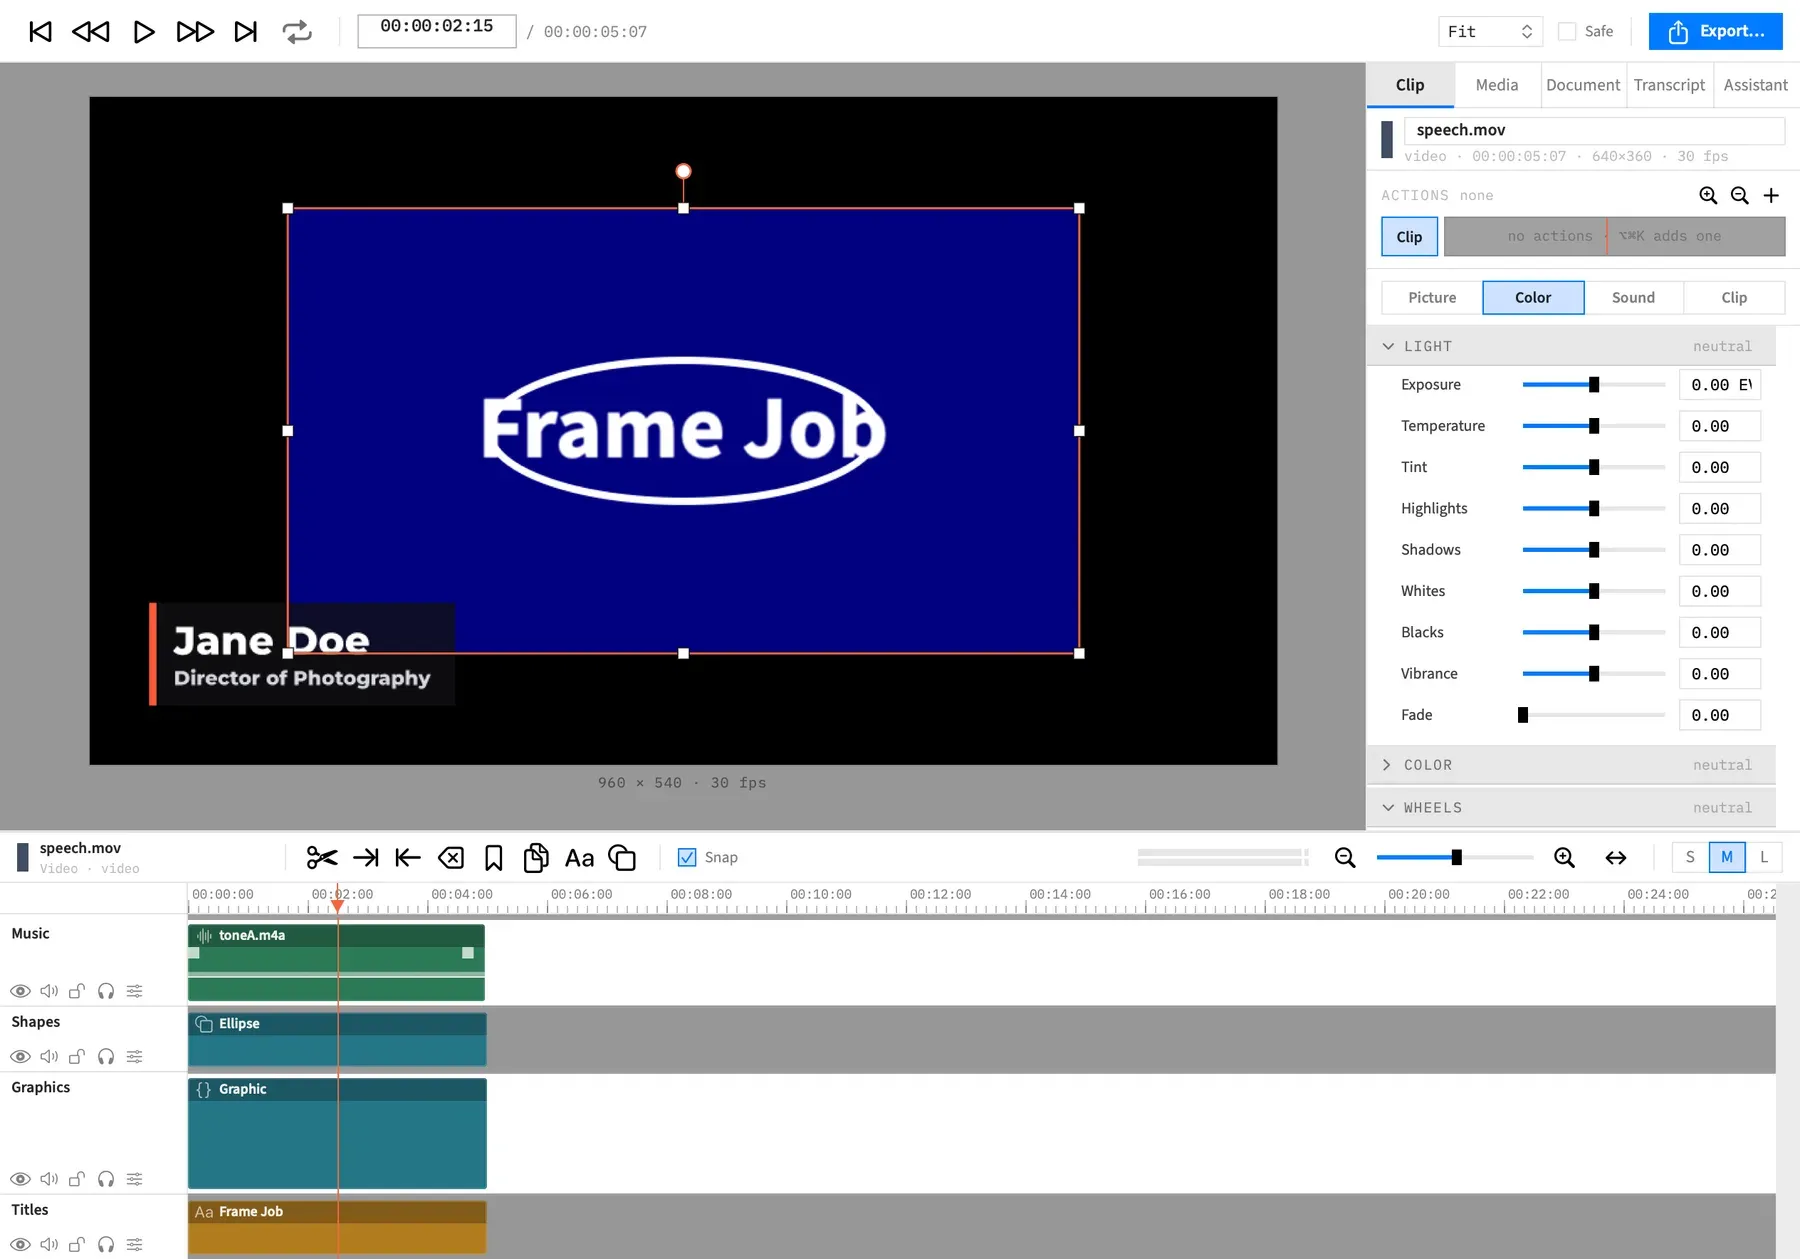
A video clip opens on Picture, so you choose Color yourself. Selecting a different clip sends the inspector back to that clip’s first sub-tab. An adjustment clip has no Picture sub-tab, so it opens on Color.
What can be graded
Section titled “What can be graded”These clips can take a grade:
- Video clips
- Image clips
- Stills (freeze frames)
- Adjustment clips, which grade everything behind them
Text, shape, graphic and nest clips have no Color sub-tab. Nor does a clip from an audio-only file.
Mixed selections
Section titled “Mixed selections”The sub-tab shows only when everything selected can take a grade, with one exception for sound.
| Selected together | What happens |
|---|---|
| A video clip and an audio-only clip | The sub-tab stays. The grade goes only to the clips with a picture. |
| A video clip and a text, shape, graphic or nest clip | The sub-tab goes. Deselect the text, shape, graphic or nest clip to get it back. |
| A video clip and an adjustment clip | The sub-tab stays, and Picture goes. The Adjustment and Qualifier sections don’t show, because not every clip is an adjustment clip. |
The sections
Section titled “The sections”The sections run down the tab in this order.
| Section | What it’s for | Shown for |
|---|---|---|
| Adjustment | How strongly an adjustment clip’s grade applies. See Adjustment clips. | Adjustment clips only |
| Qualifier | Narrowing an adjustment clip’s grade to one colour or tone range. See Qualifiers. | Adjustment clips only |
| Light | Exposure, white balance and tone. See Light. | Every gradable clip |
| Color | Overall brightness, contrast, saturation and hue. See Brightness, contrast, saturation and hue. | Every gradable clip |
| Wheels | Pushing the shadows, middle tones and highlights toward a colour. See Wheels. | Every gradable clip |
| Curves | Shaping tones and hues with points on a curve. See Master and RGB curves and Hue vs Hue and Hue vs Sat curves. | Every gradable clip |
| Look | A built-in look or your own LUT. See Looks and .cube LUTs. | Every gradable clip |
Adjustment and Qualifier show only when every selected clip is an adjustment clip.
Which section opens
Section titled “Which section opens”Every section starts closed. If no section is open when the tab appears, it opens the first one you haven’t closed yourself. Once you’ve opened or closed a section, Frame Job remembers that, for every clip and the next time you launch it.
With an action selected, the sections it animates open by themselves. That doesn’t change how you left them.
Read a section header
Section titled “Read a section header”A section’s header sums up its state, so you can see what a clip carries without opening anything.
| Section | The header reads |
|---|---|
| Light, Color, Wheels, Curves | “neutral” or “adjusted” |
| Look | “none”, the look and its amount such as “Warm 80%”, or “mixed” when the selected clips differ |
| Qualifier | “off”, or what’s on, such as “hue · sat · inverted” |
| Adjustment | The strength, such as “75%” |
Reset a section
Section titled “Reset a section”Reset appears in a section’s header while the section differs from its default. It returns that section to neutral and touches nothing else, so resetting Light leaves Color alone. On Adjustment it puts Strength back to 100 %.
To put back one control rather than a whole section, right-click its label or slider and choose Reset to default. It’s dimmed while the row already holds its default.
With an action selected, a section doesn’t offer Reset. It shows Clear instead while the action animates any of that section’s rows, and Clear takes the section out of the action. On a row, the right-click item reads Set end value to default. See Animate a grade.
Grade several clips at once
Section titled “Grade several clips at once”Select the clips and use the tab as you would for one. A control changes only its own value on each clip and keeps their other values, so dragging Exposure across three clips changes their exposure and nothing else.
The value you set is the same on every clip. It isn’t an offset from what each clip had.
When the selected clips hold different values for a control, its row shows a mixed badge.
An action belongs to one clip, so with several clips selected every control sets the clips’ own values, even if one of them has an action.
Undo in the Color tab
Section titled “Undo in the Color tab”| You did this | It’s one undo step named |
|---|---|
| Dragged a slider or typed a value | The control: Undo Exposure, Undo Hue, Undo Strength |
| Pressed a section’s Reset | The section: Undo Light, Undo Color, Undo Wheels, Undo Curves, Undo Look, Undo Adjustment, Undo Qualifier |
| Pressed a section’s Clear | Undo Clear |
The fixed grade order
Section titled “The fixed grade order”A grade always applies in one order, whatever order you made the changes in. This is the whole pipeline, the order of operations on every clip:
- Color: brightness, contrast, saturation and hue.
- Light.
- Wheels.
- Curves: the tone curves first, then the hue curves.
- Look.
You can’t change this order, so the same settings always give the same picture. The tab lists Light above Color, but Color acts first.
There are no nodes, in series or in parallel, and no layer mixer. A clip has this one chain. To grade on top of a grade, stack adjustment clips on separate tracks. Each one grades what’s drawn behind it, including the result of any adjustment clip below it, at its own Strength.
A Camera Log conversion set on the media comes before all of these, and a chroma key follows it, so a key reads the picture before your grade.
Filters around the grade
Section titled “Filters around the grade”The filters in the Picture sub-tab act on either side of the grade, which matters when you combine one with a grade.
| Filter | Where it acts |
|---|---|
| Pixelate | Before the grade |
| Blur, Sharpen | After Color’s four controls and before Light |
| Sepia, Noir, Vignette, Invert | After the Look, in the order you stacked them |
So a filter such as Noir or Vignette works on the graded colour.
Show Ungraded leaves filters on, because they aren’t part of the grade.
One grade everywhere
Section titled “One grade everywhere”The preview, File ▸ Save Frame… and every export apply a grade the same way, so what you see while grading is what you get.
A clip you haven’t graded renders exactly as it would without a grade. A neutral section does nothing to the picture.
A grade belongs to the clip, not to its file. Splitting a clip gives both pieces the grade, and a speed change or a relink keeps it.